On a day when solid early morning rain would have persuaded most organisers to cancel their events, presenter Steven and I decided to go ahead with a planned Espalier workshop. I am glad we did, because further rain held off until mid-day, and that gave us just enough time. As we ended, the rain returned.
There is a lot of material about Espalier on the internet, but seeing a garden full of espaliered fruit trees, and hearing what Steven learned while working with many fruit tree varieties over the years, really set this apart from any YouTube video.

Steven and Kathryn live on an internal block of land and their garden and driveway are entirely bordered by fences. As you enter their driveway you see espaliered fruit trees all along both sides of the driveway and this line of fruit trees continues along his fences right around the property.
Mid-August was a good time to have this workshop because we could see how each tree has been espaliered, whereas later in the season the fence line will be a sea of leaves and you would not be able to see the techniques used.
Steven's espalier frames
Steven used the metal posts of the fences around his property as supports for his espaliered trees. By doing so he saved himself an enormous amount of work and provided one of the key elements of a successful espalier: a frame that is solid and that can't be blown over by strong winds.

He also used wire-tensioners (left-hand side of the photo above) to make his metal wires really tight. They wouldn't need to be tight at this time of the season (August), but in summer, when his trees hold a lot of fruit, and therefore a lot of weight, tight lines are another important requirement for a good espalier set-up. The tighteners/tensioners Steven used are Zenith 5mm Galvanised Eye and Eye Turnbuckles. He bought them at Bunnings.
All fence posts have four lines attached to them which are around 30 centimetres apart. Looking around the garden we saw that in most cases there was one espaliered tree in the centre between two fence posts - one tree per every 2.75 - 3 metres.
Espalier types commonly used in Australia
Apple and pear trees are commonly espaliered along horizontal lines like the ones Steven has in his garden. This type of espalier is known as T-shape or Cordon.


Steven has espaliered apple, pear, apricot, peach, nectarine, cherry and mulberry trees, often more than one variety of each of these. The fences right around his property are covered in a wonderful array of fruit trees. None are espaliered according to the Fan-shape method. How does he do it?
The amazing resilience of trees
Steven learnt that you can be pretty ruthless if the branches of the young tree that you plant along an espalier frame are not really right for T-shape espaliering.

Let's take the tree in the photo above as an example: at the bottom, just above ground, is the thick area that is the point where the tree was grafted. Always cut off any growth that is below this point. Plant the tree so the graft is above ground. For more info about grafting see A Look at Grafting on the Food Garden Group blog.
There have been instances where Steven planted a new young fruit tree and then cut its trunk 10-20 centimetres above the graft, leaving just a stump without any branches. Less experienced people might be reluctant to do so because it could kill the tree. However, Steven has dealt with enough fruit trees to know that, once out of dormancy, most trees have the strength to grow new branches. Those young new branches are soft and pliable enough so after a while he can bend them gently to go along the lowest horizontal espalier line.

Steven trained the new branches to go along his wires. He is not saying that everyone should do this. It just shows that, if you do this, in most cases the tree will recover. He only does this if the branches it came with are not flexible enough to make it to that first wire.
Pruning - When and How
The example above is the only case when Steven prunes a fruit tree at time of planting in winter!
Pruning in winter runs the risk that the tree will catch Gummosis (see Food Garden Group blog post Pest-Control Quick-Guide) and other diseases because the tree is dormant and not strong enough to fight infections.
If he needs to do such a drastic pruning at this stage, Steven then treats the wound with methylated spirits or bleach to prevent diseases and to stop bleeding. He doesn't ever use tar for this purpose. No need for any of these disinfectants if you prune at other times of the year when the tree is not dormant.
Never prune on an overcast cool rainy day. Prune on a day with sunny weather and forecast of sun in coming days. Steven put it this way: sun light is the best stuff for sterilising pruning wounds.
In general, pruning fruit trees is best done in autumn after fruit has been harvested and well before trees go dormant. For more info on pruning and how and when to prune seven types of fruit trees see Food Garden Group blog post Quick Guide to Pruning Fruit Trees.
Steven found out that commercial apricot growers cut back their young apricot trees radically the first year, then again the next year, and again the following year. By doing so they create pliable new young branches that over these three years can be gradually shaped into a T-shape espalier.
Steven uses a similar approach for all his fruit trees. He cuts off branches or tips of branches that are the wrong shape or that are too inflexible to be bent to go along his horizontal lines. He then guides newly formed young branches that are pliable enough to be bent without braking. This method allows him to espalier most types of fruit trees along his horizontal lines.
Steven explained that for him espaliering is not something you do once or twice a year. It is an ongoing job. You give it a bit of time when you have the time. You monitor the growth of your espaliered trees. Over summer you prune your trees, often more than once, as needed. You train your trees to respond to your pruning. His words.
On a tree like the one below you also shorten the vertical side-branches because you want sun on as many fruits as possible. But you don't do this in winter. You do it once the tree is out of dormancy, so the sun and the tree's own defences can heal the wounds.
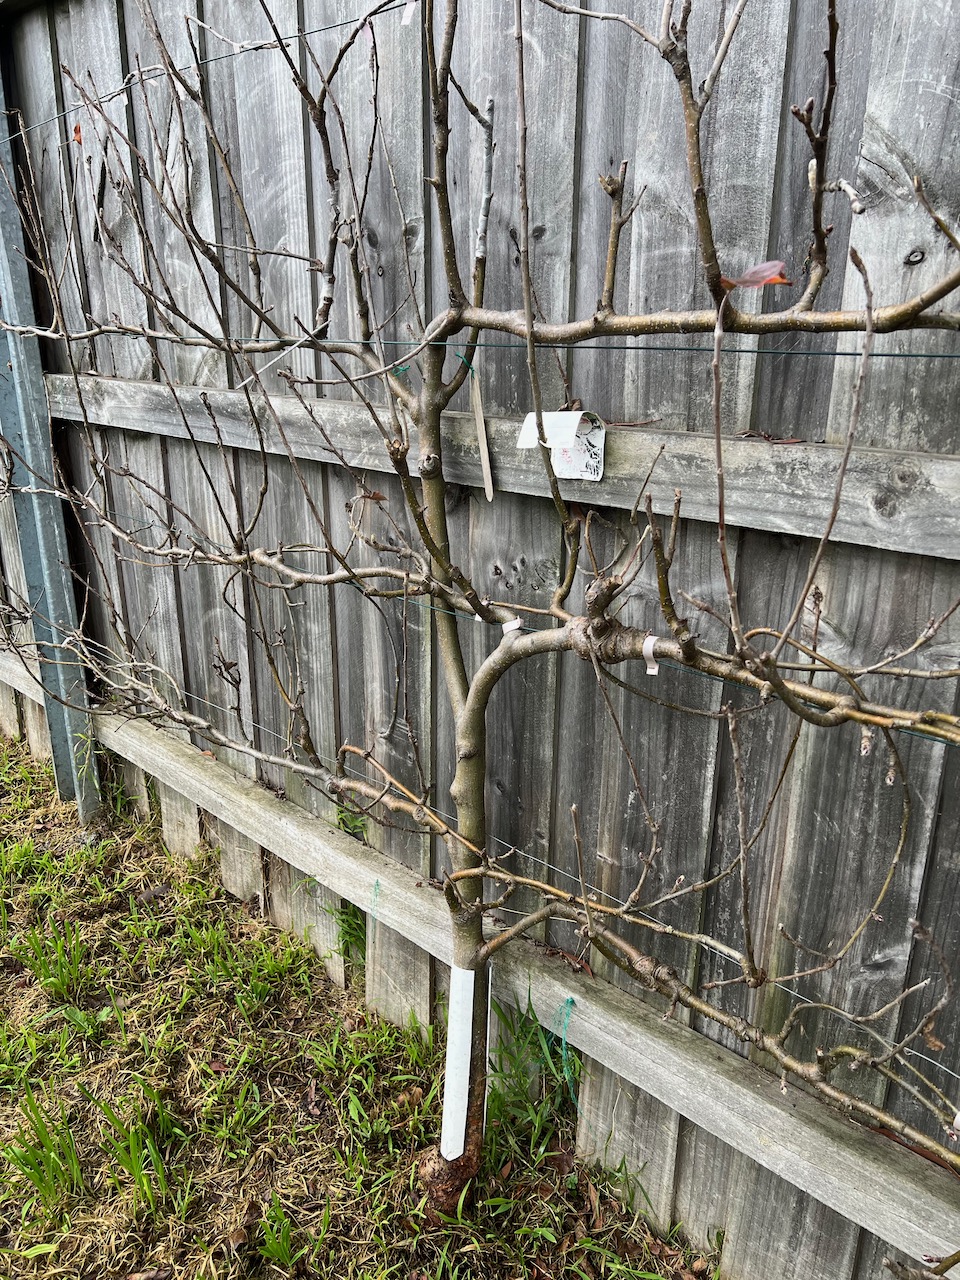
PS: the tubing around the base of the tree in the photo above is there to make sure he does not damage the base of trees when he trims the grass. Note the fact that the tubing has been cut, so when the trunk becomes wider, the tree is not choked.
How does Steven attach the branches to his wires?
Below is a close-up of one of Steven's branches along a horizontal espalier line.

He attaches branches to his horizontal lines by using a tool called a tapener gun. You hold the tapener gun against the branch and the line, press the tool and it surrounds both with a little bit of tape, then cuts the tape. The tool is used by professional orchardists. It is a perfect fast way to attach branches to wires.
You don't ever remove the tape. It gradually breaks down, but stays in place long enough for the branch to become rigid and firm, so the branch still follows the wire when the tape is no longer there.

Steven bought the tool and buys the tape at Hollander Imports (Brooker Hwy, Hobart) for around $165 (August 2024). I found it online here for a similar price. Companies that stock for orchardists will have it for sale.
I end with a photo of a Marionberry bush in Steven and Kathryn's garden. It is espaliered on a strong free-standing frame with tensioned wires and mesh. There is a reason why this berry is on a free-standing frame. It allows you to walk around it. You need to, when you carefully try to pick its fruits, because its thorns are lethal.

No comments:
Post a Comment
Note: Only a member of this blog may post a comment.